> For the complete documentation index, see [llms.txt](https://learn.autoreelapp.com/llms.txt). Markdown versions of documentation pages are available by appending `.md` to page URLs; this page is available as [Markdown](https://learn.autoreelapp.com/creating-a-video/how-to-create-a-video/create-an-unbranded-video.md).
# Create an unbranded video
{% stepper %}
{% step %}
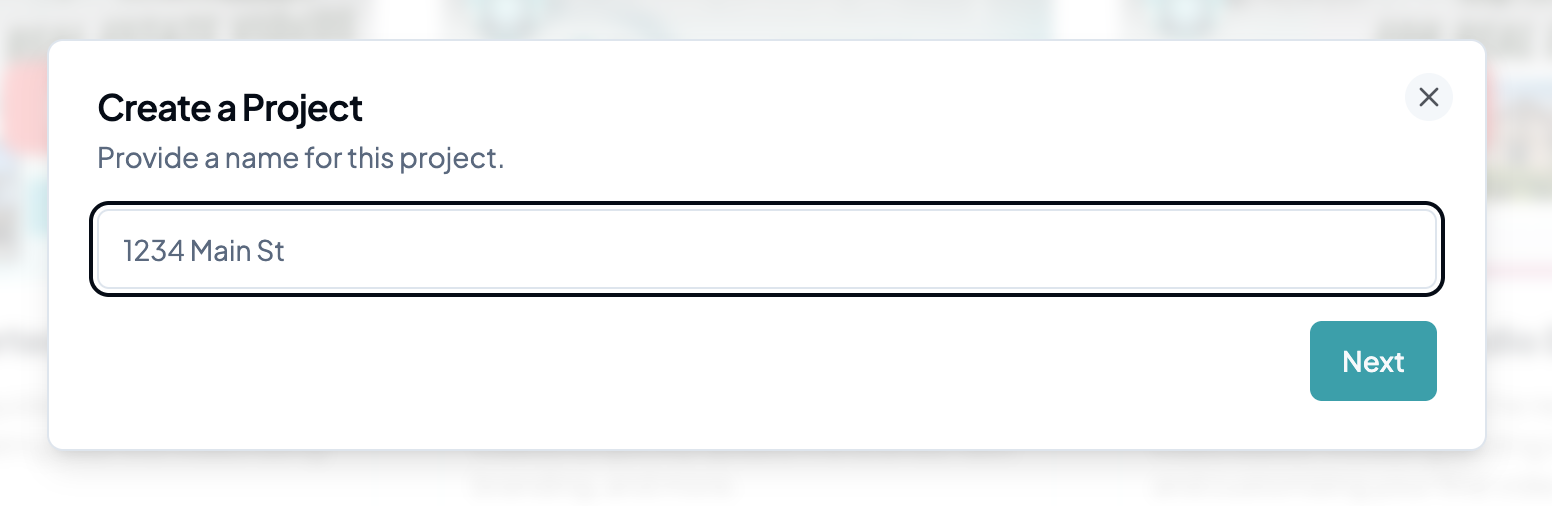
### Create a project
Create and name your project. Each project should have its own set of photos, which will be used for edits and videos.
{% endstep %}
{% step %}
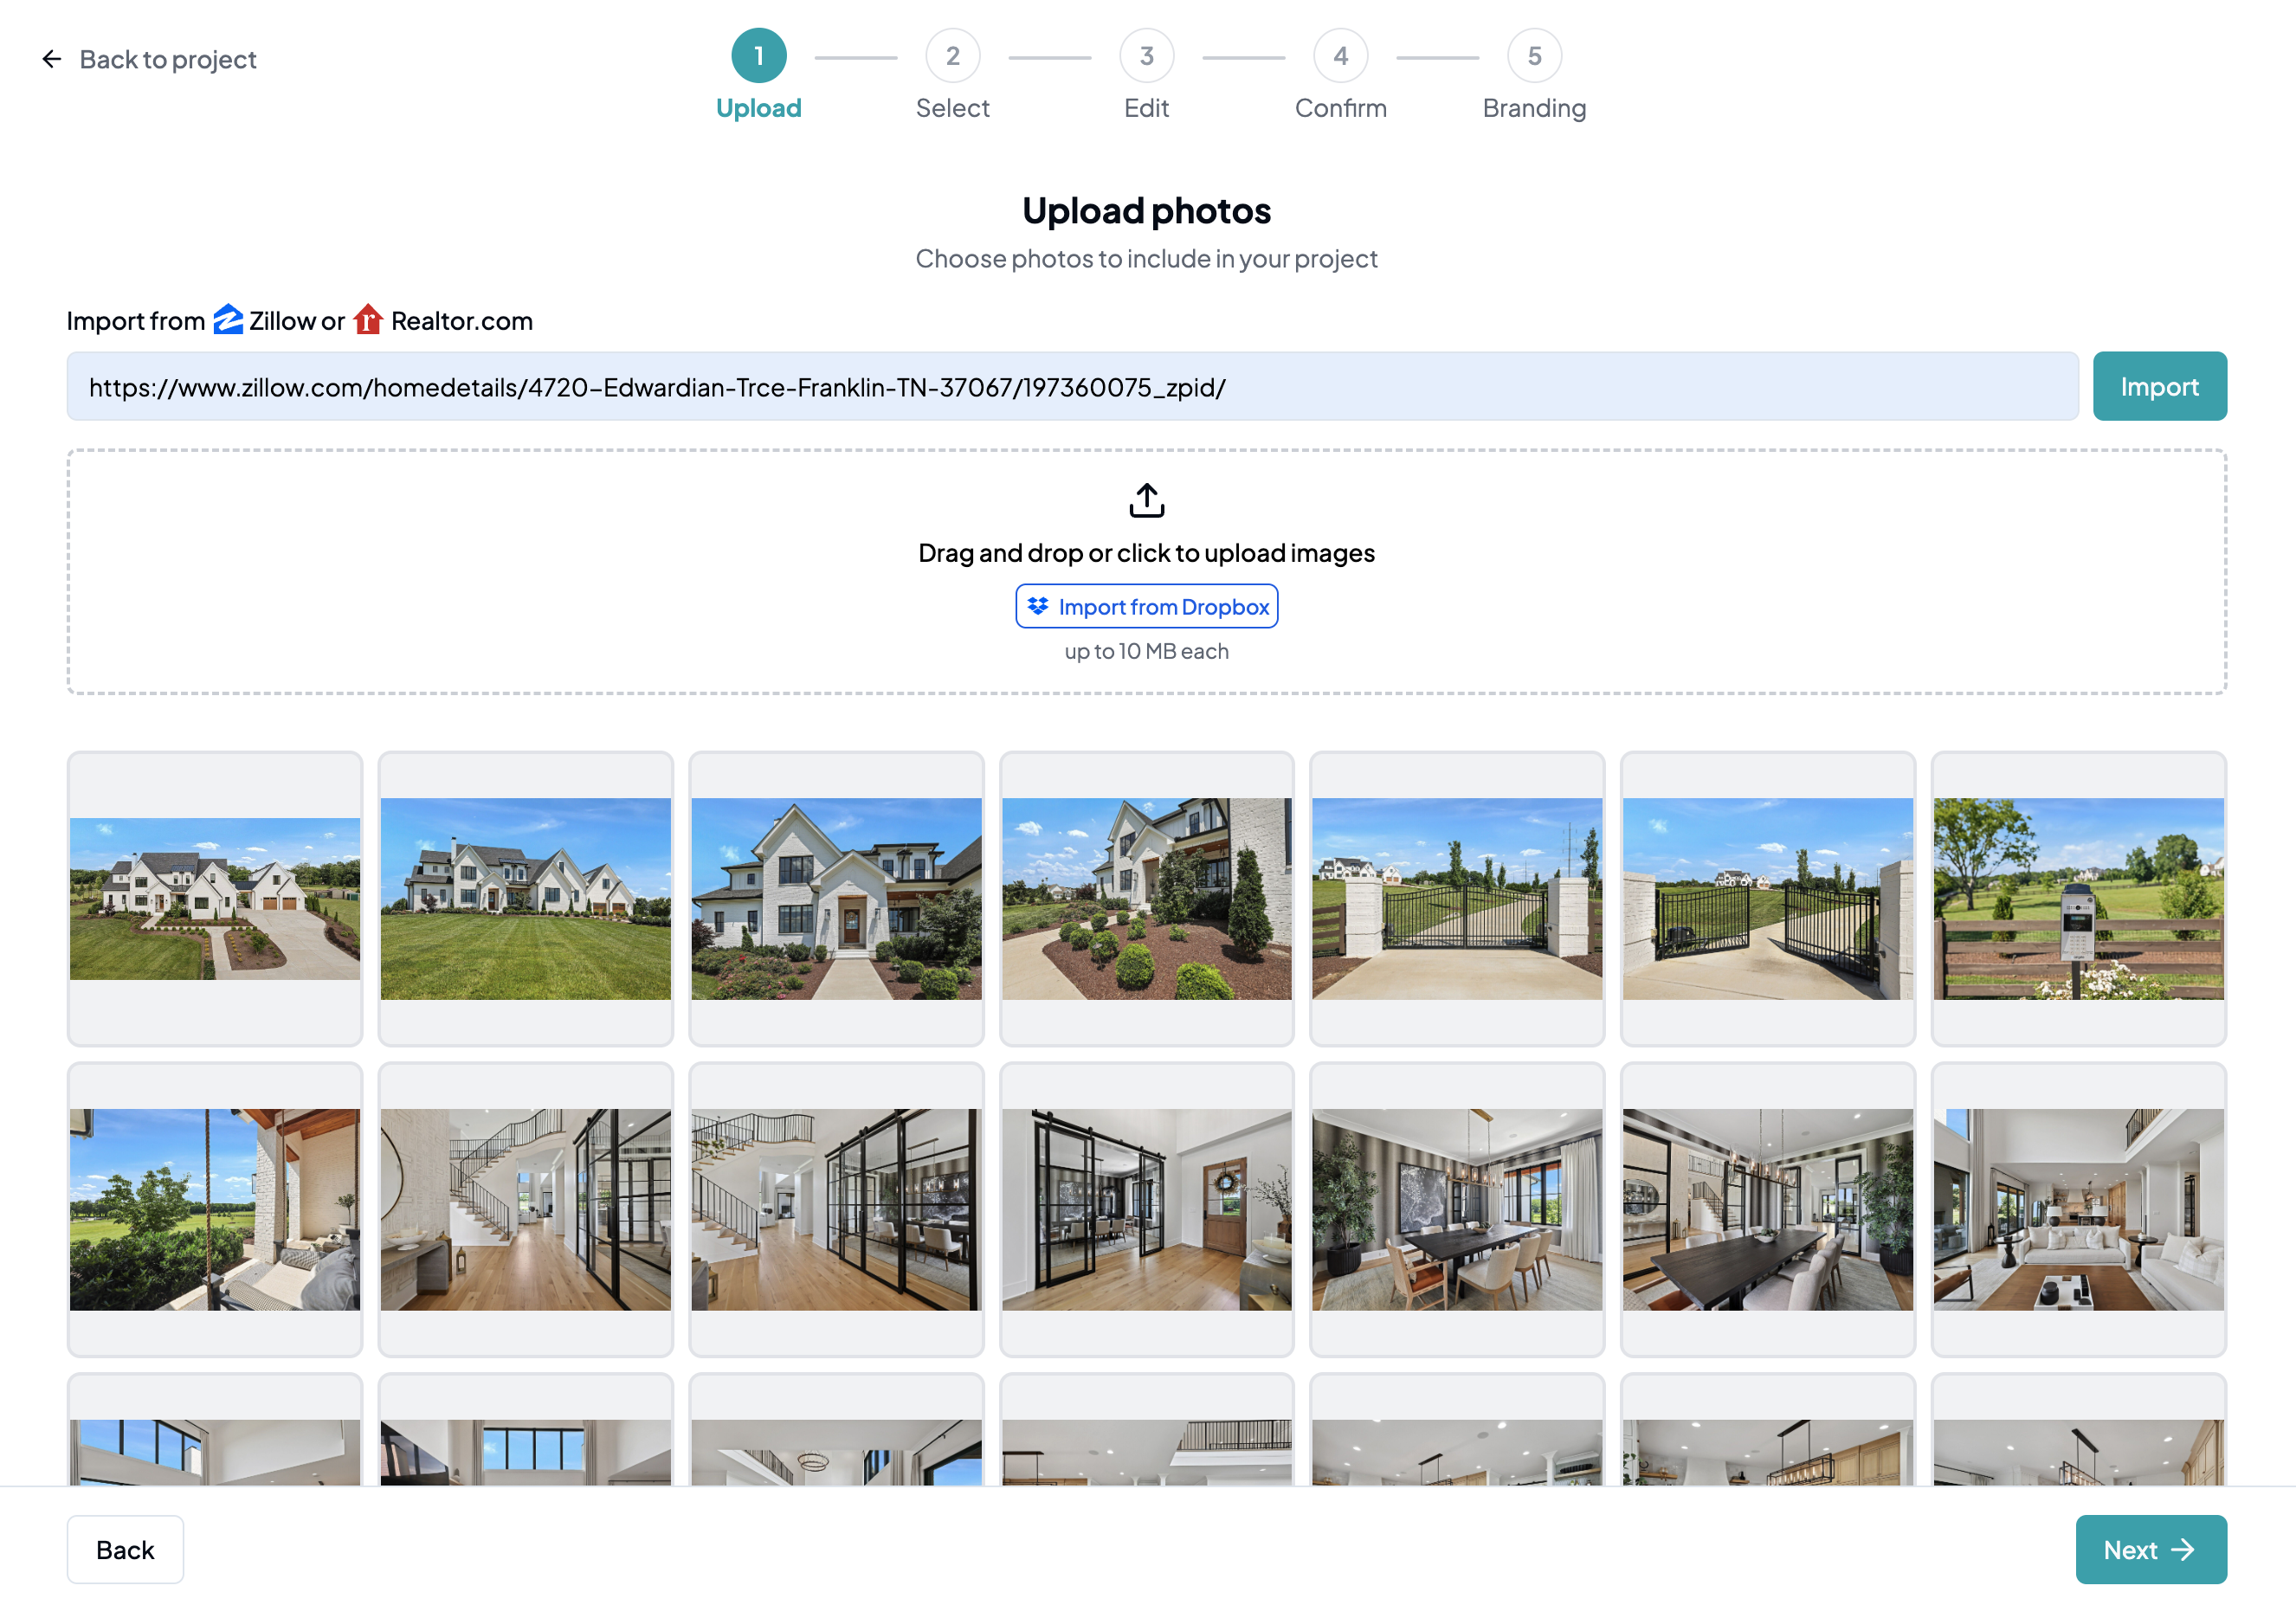
### Upload your photos
Upload your listing photos using any of the following methods:
1. **Upload via URL:** Enter a Realtor.com listing URL and click **Import** to pull in your photos automatically.
2. **Import from Dropbox:** Click **Import from Dropbox**, sign in, and select your photos.
3. **Upload from device:** Click inside the dotted area or drag and drop photos directly from your computer or phone.
Once done, click **Next** to proceed to the next step.
{% endstep %}
{% step %}
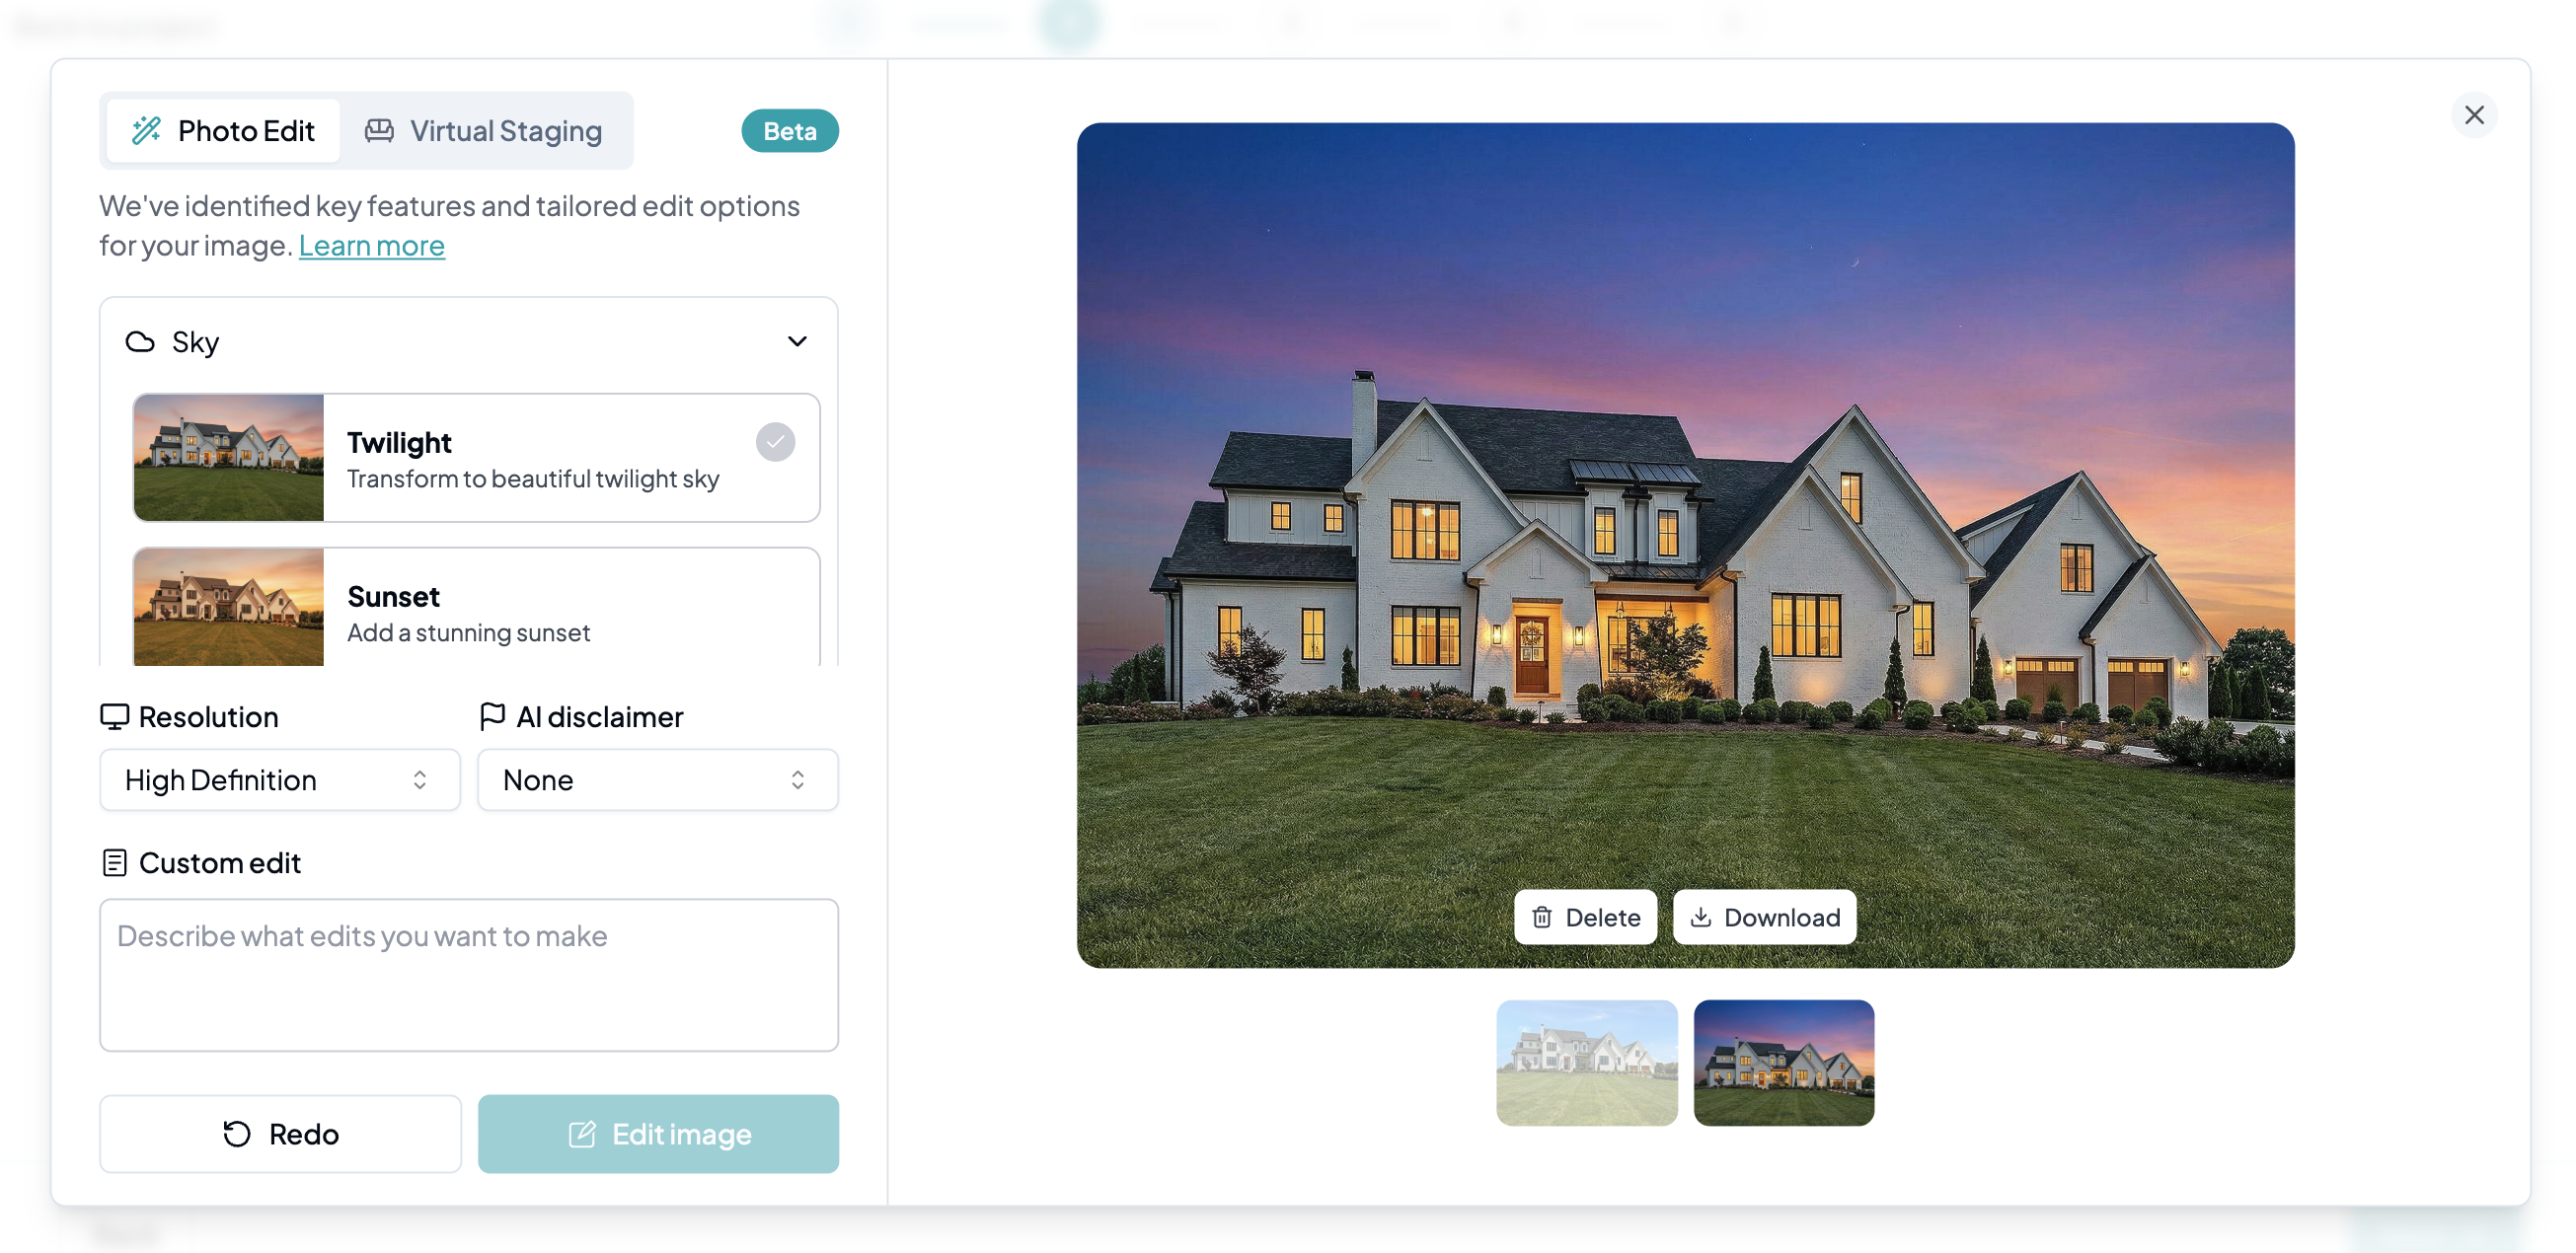
### Edit and virtually stage your photos
To learn how to edit and virtually stage photos, visit [Photo Editing & Virtual Staging](/photo-edits-and-virtual-staging/photo-editing-and-virtual-staging.md) for a full walkthrough.
{% endstep %}
{% step %}
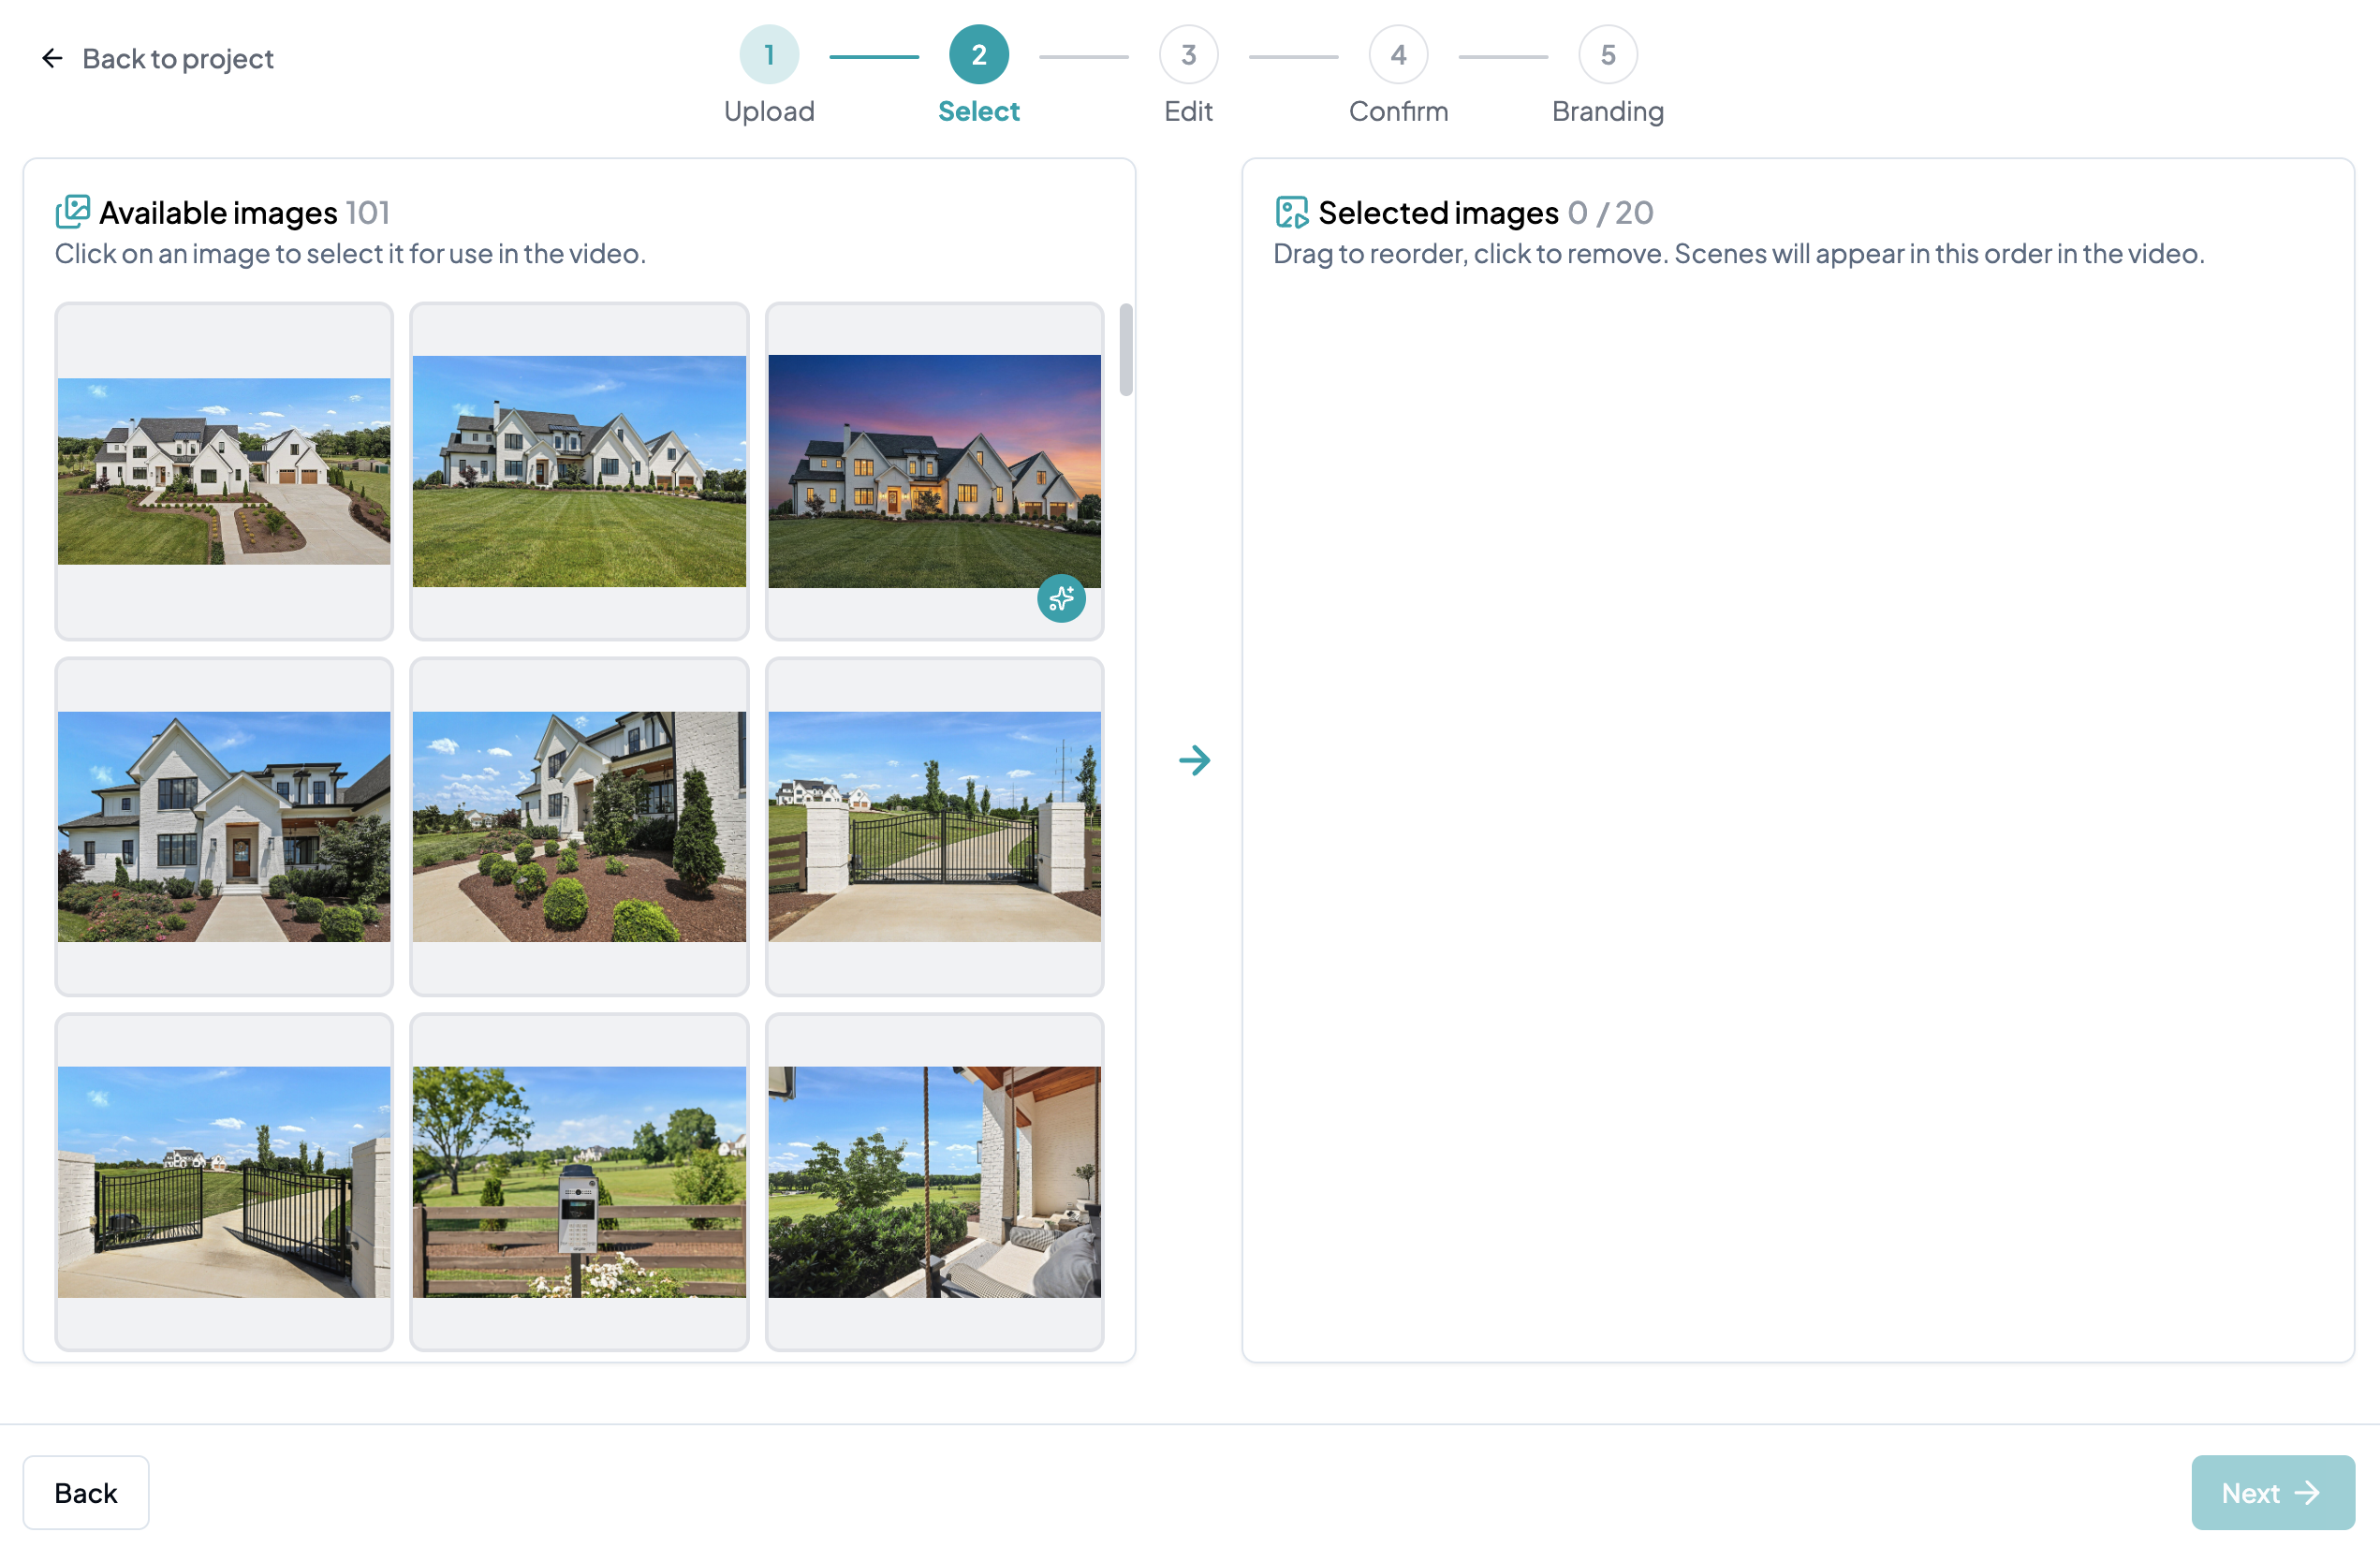
### Select which photos to use in the video
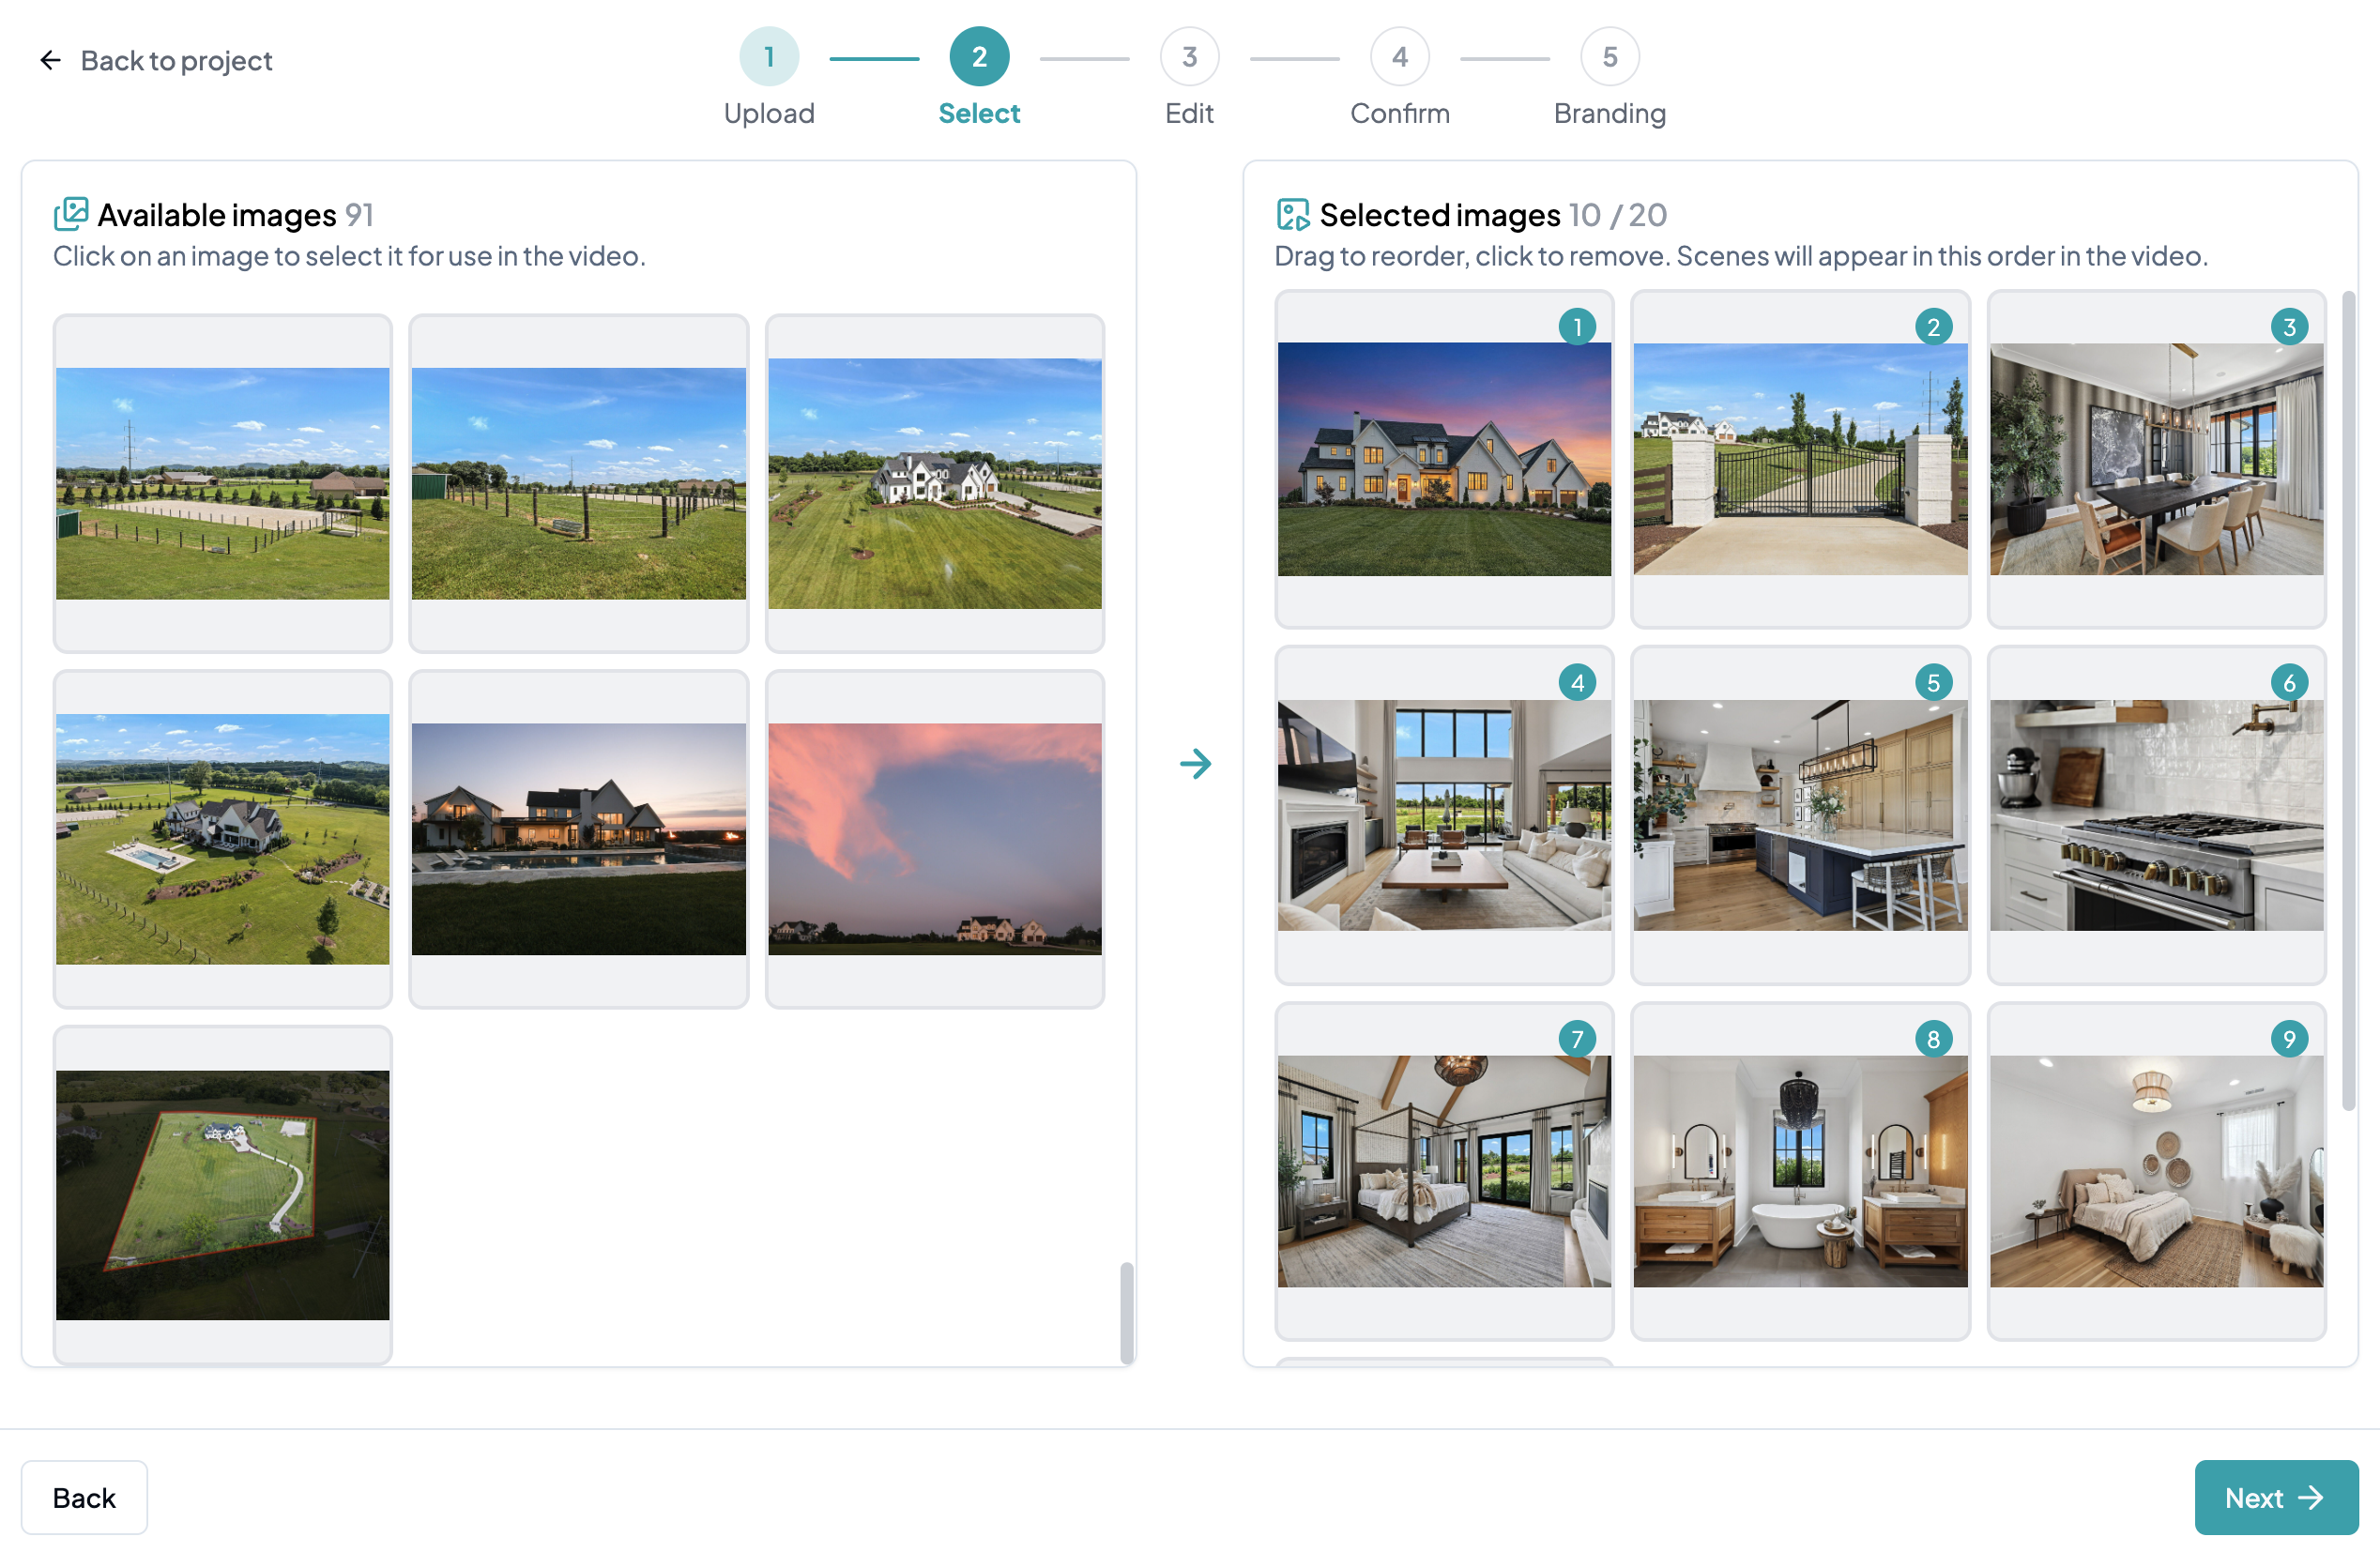
Choose which photos to include in your video. Click a photo on the left to add it to your video — it will move to the right side. To reorder, drag and drop the photos on the right. To remove a photo, simply click it from the right side to move it back.
Paid plans support up to **20 photos**, which produces approximately a **1-minute video**.
> 💡 **Pro tip:** Each photo becomes a 3-second clip, so use that as a guide when deciding how many photos to include.
{% endstep %}
{% step %}
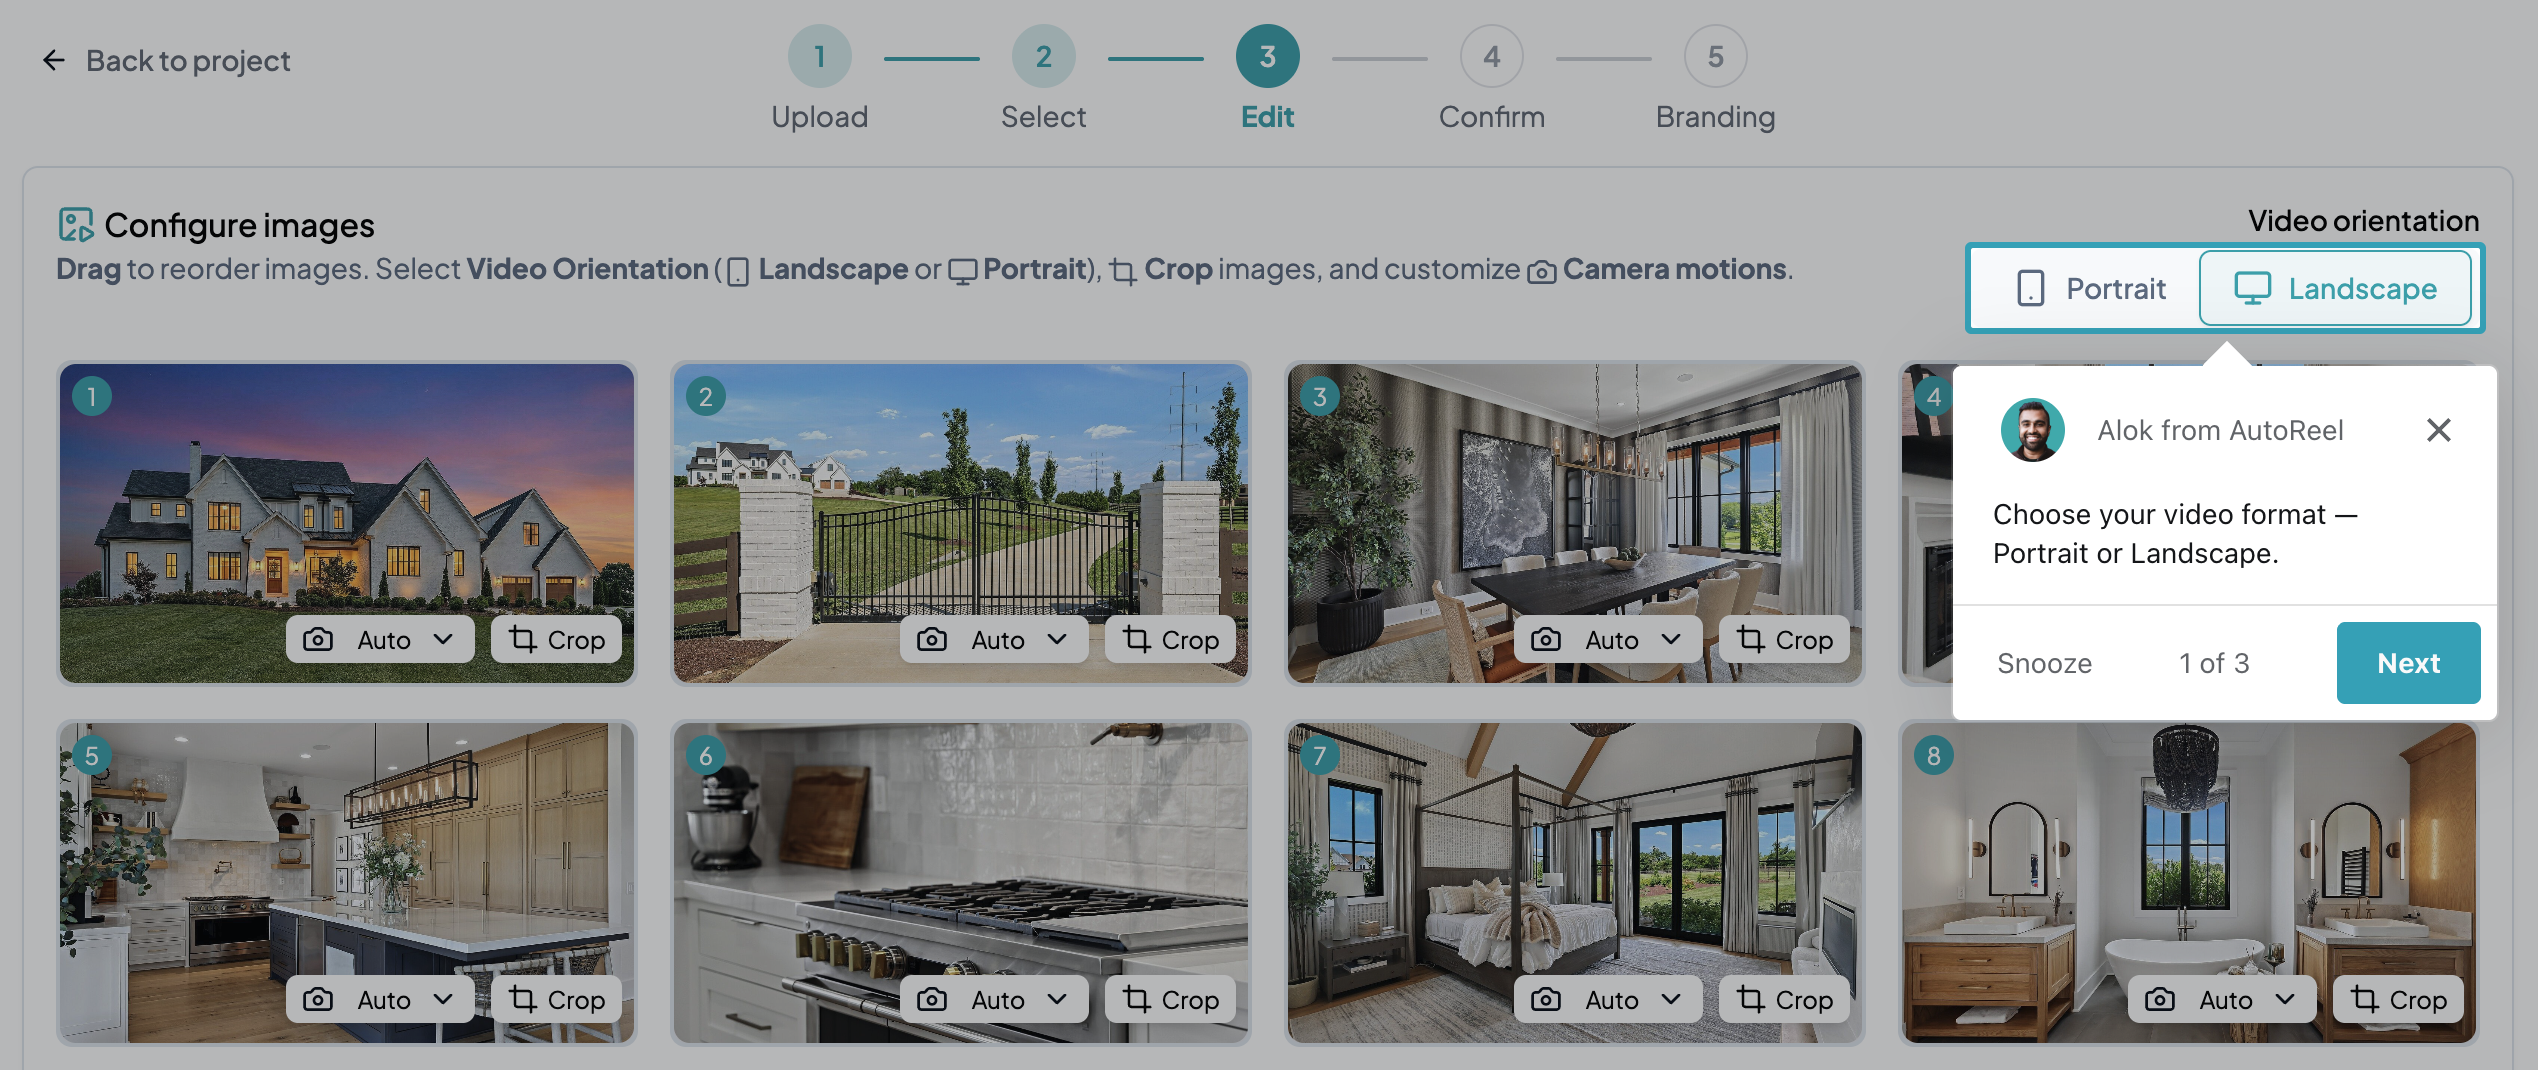
### Select the video orientation
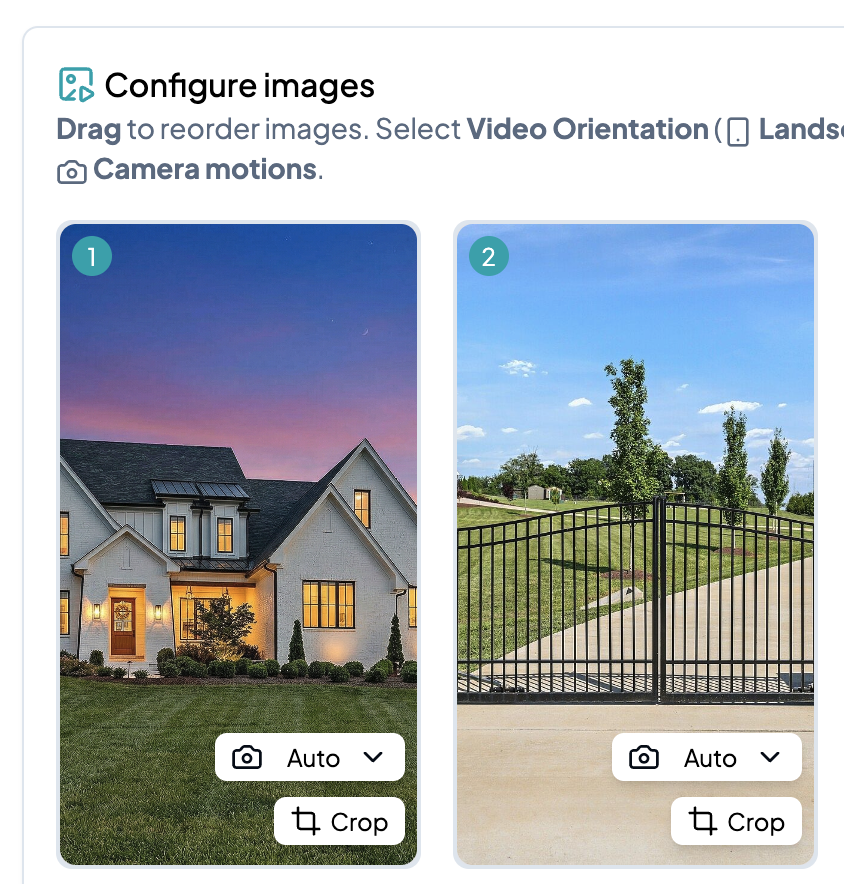
Choose between **Landscape** or **Portrait** depending on where you plan to share your video.
* **Landscape:** Best for MLS, YouTube, Facebook, and LinkedIn.
* **Portrait:** Best for Instagram and TikTok.
{% endstep %}
{% step %}
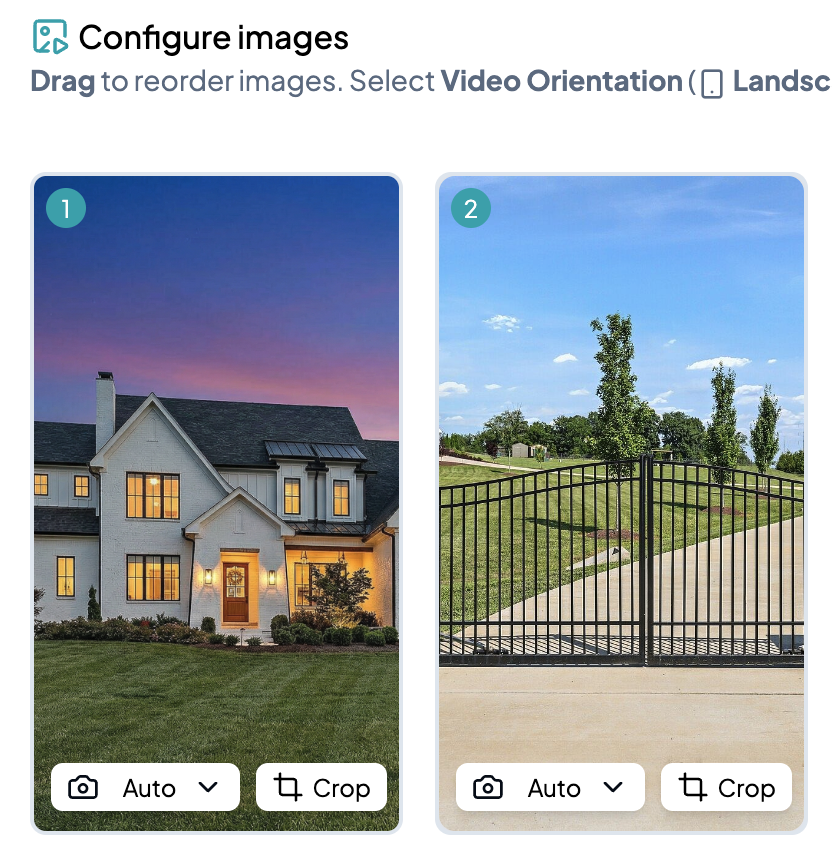
### Crop your scenes
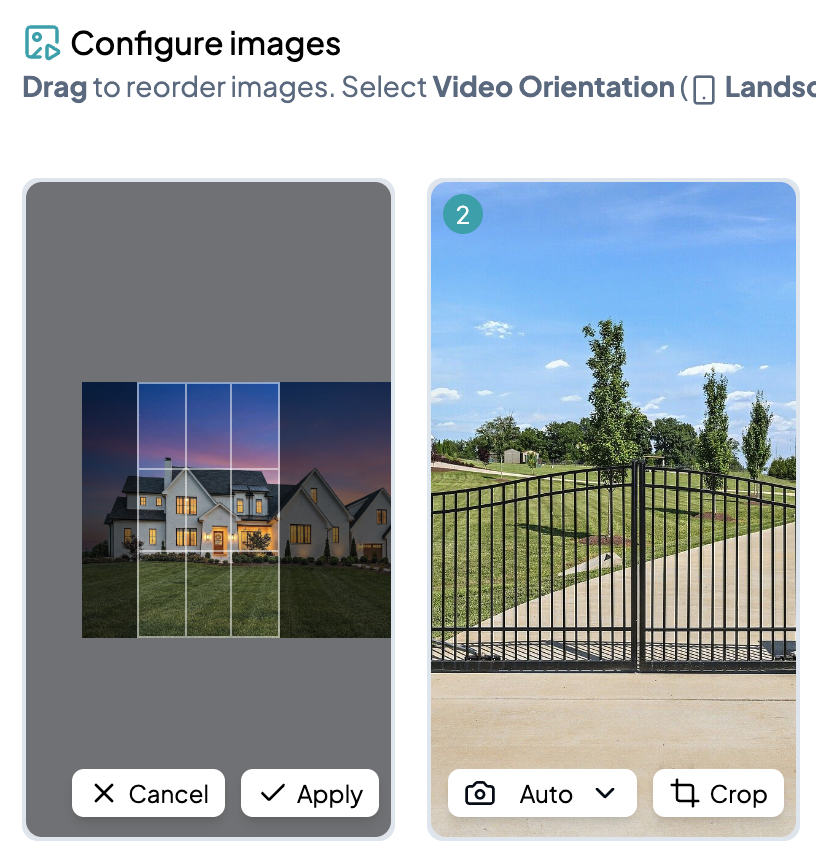
By default, AutoReel focuses on the center of each photo. To adjust, click the **Crop** button on any photo, then drag or zoom to capture the best area, then click **Apply**.
This is especially useful when creating portrait videos from landscape photos, where you may want to focus on a specific part of the room rather than just the center.
{% endstep %}
{% step %}
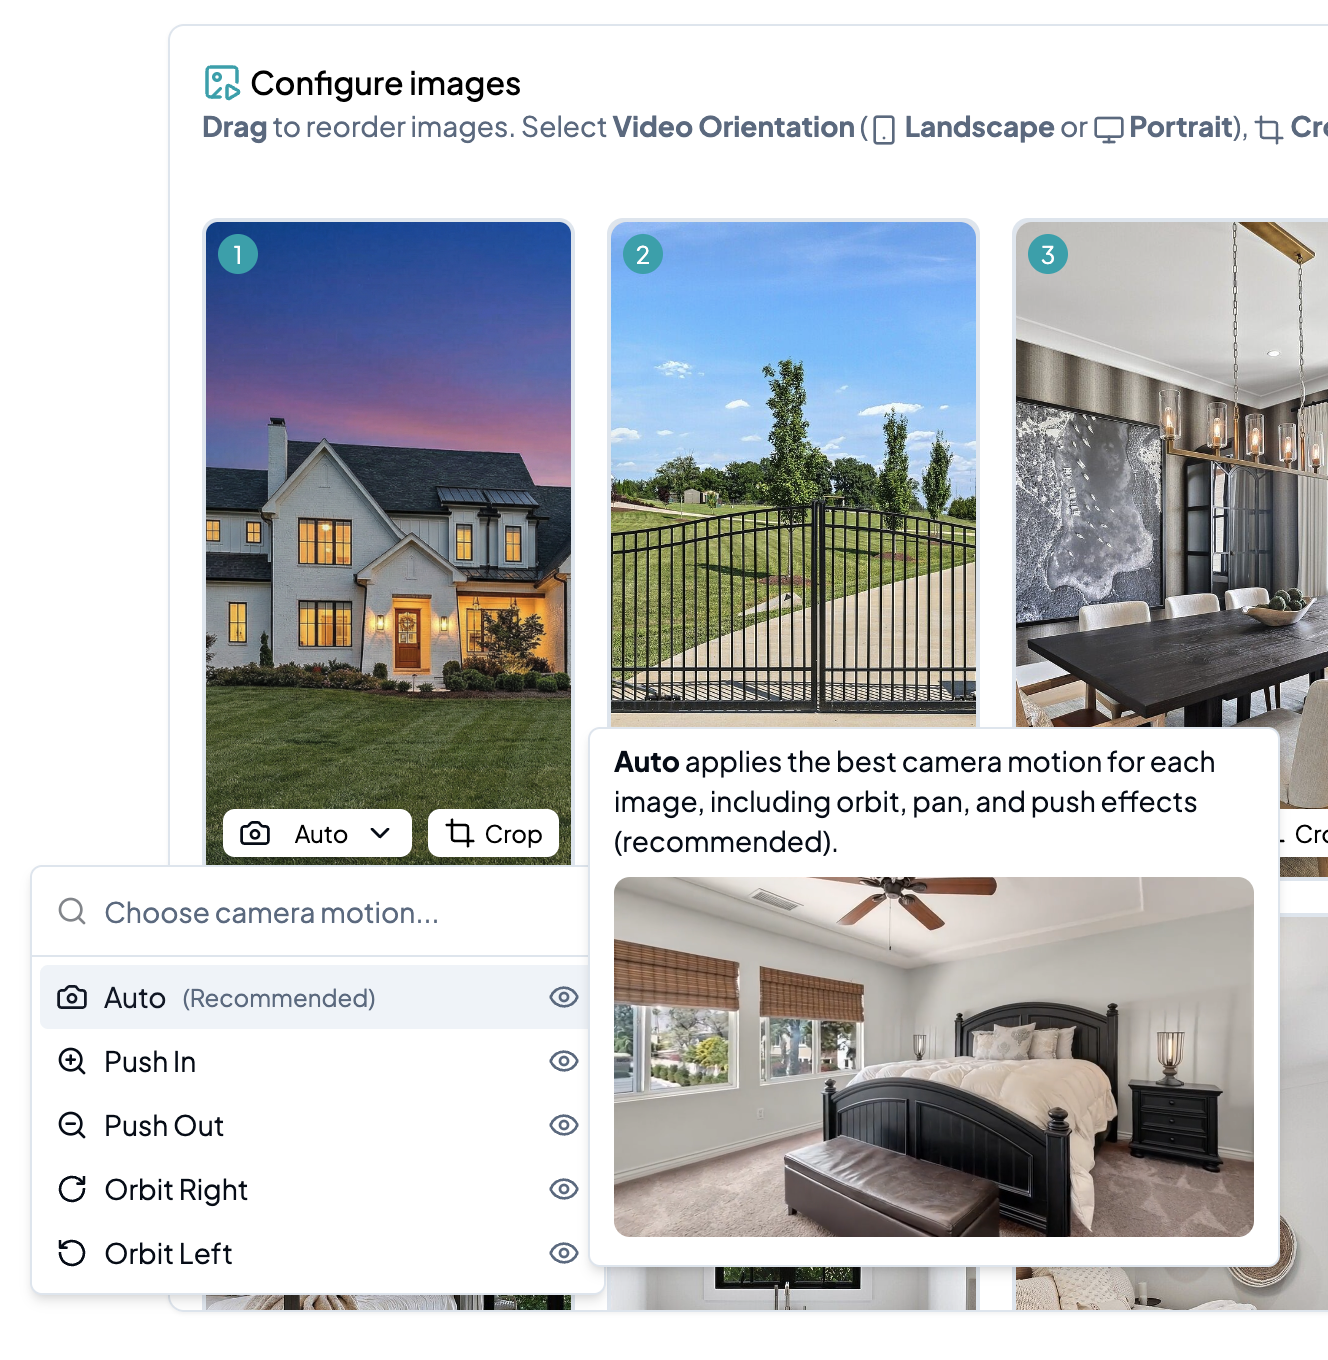
### Select the camera motion
By default, AutoReel uses **Auto** mode — AI analyzes each photo and applies the best camera motion based on the angle and composition.
For more control, click the **Camera Motion** button on any photo and choose from:
* **Push In**
* **Push Out**
* **Orbit Left**
* **Orbit Right**
> ⚠️ **Heads up:** Custom camera motion may increase the likelihood of AI artifacts in your video.
{% endstep %}
{% step %}
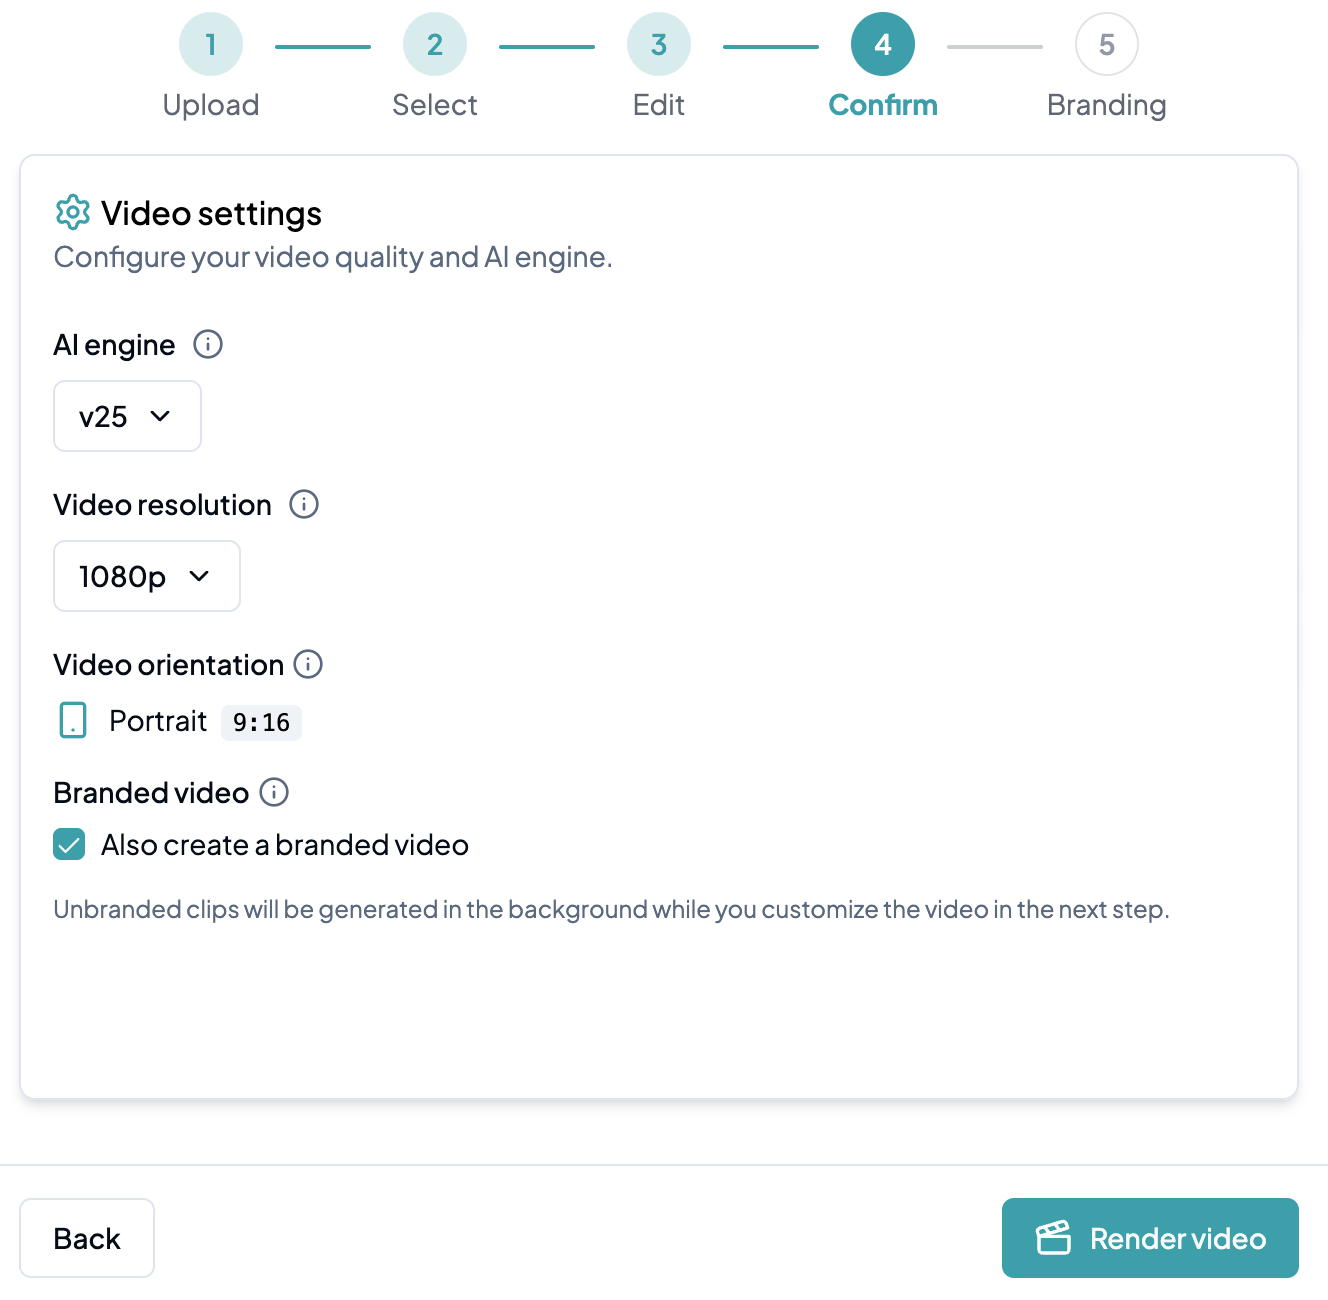
### Review video settings
Before rendering, review the following settings:
* **AI Engine:** Defaults to **v25**, our latest and most accurate model.
* **Resolution:** Defaults to **1080p** for highest quality, or choose **720p** for faster rendering.
* **Orientation:** Confirm landscape or portrait is correct.
* **Branding:** Confirm whether you'd like to add branding in the next step.
Once everything looks good, click **Render video** to kick off your unbranded video.
> ⚠️ **Heads up:** Rendering will consume **1 video credit** and cannot be undone. You won't be able to edit the base video after this point — branding is added on top while the video processes.
{% endstep %}
{% step %}
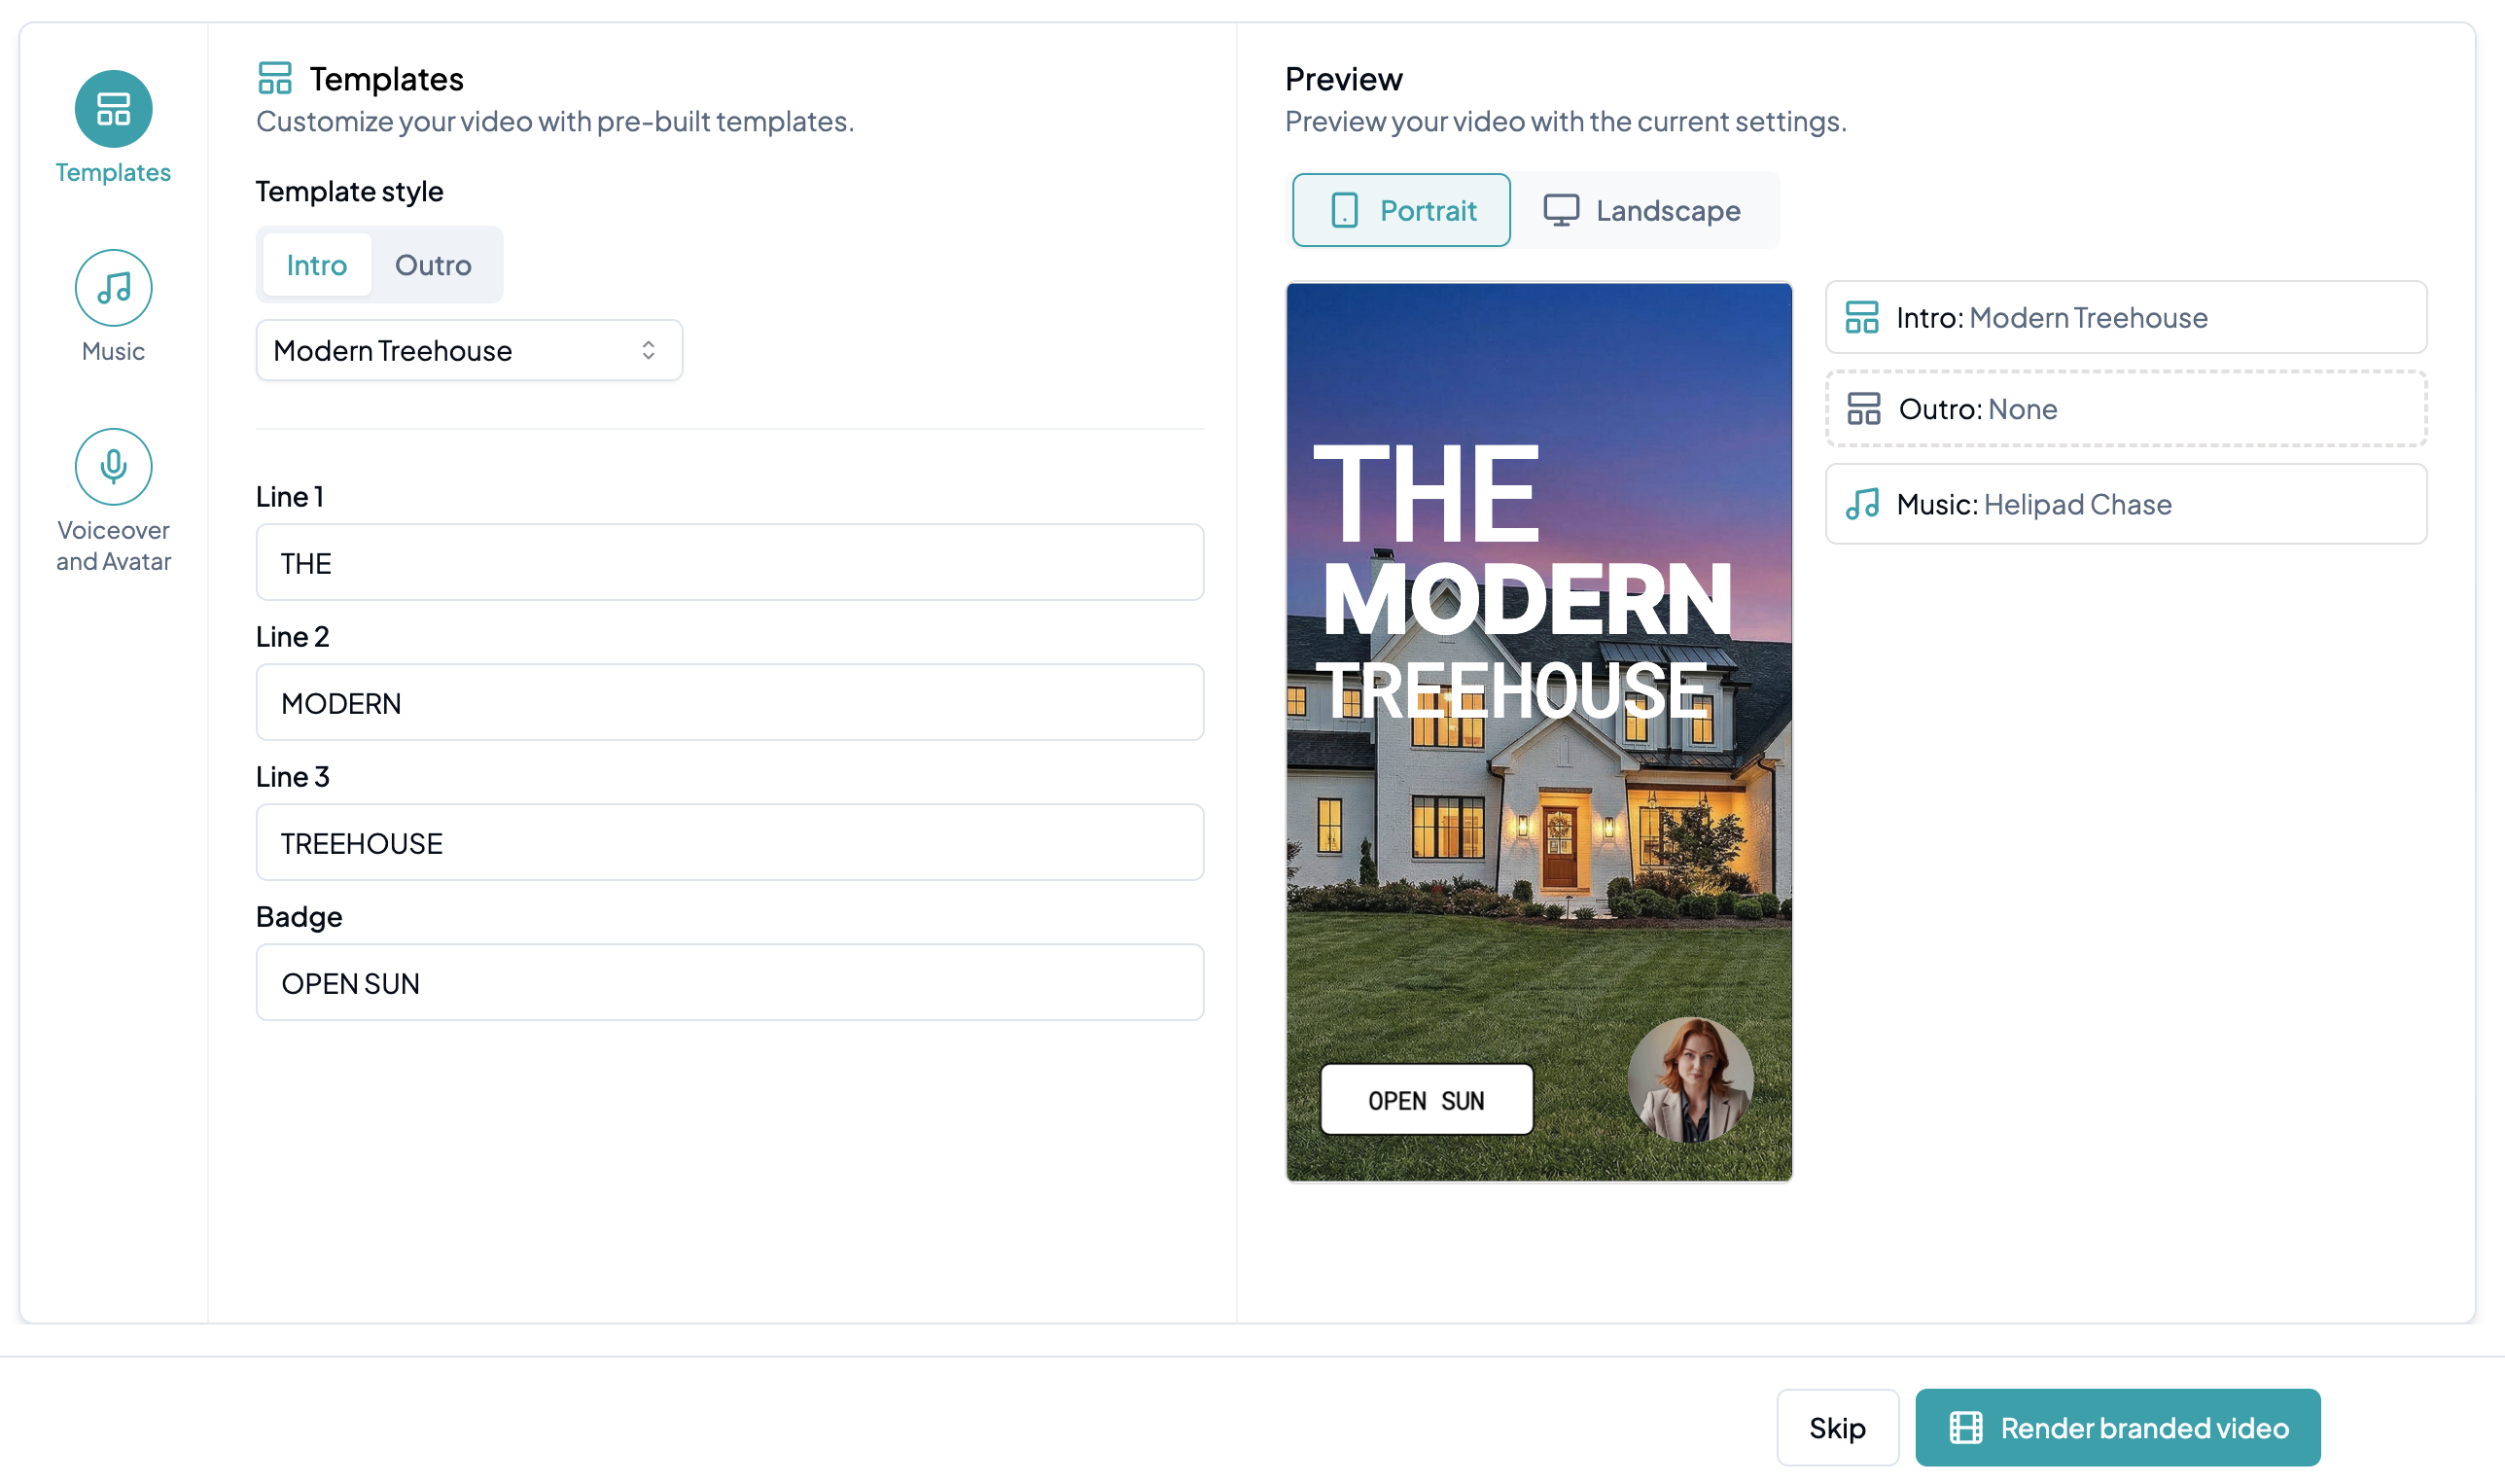
### Add branding to the video
This is where your video comes to life. Layer in any of the following to make your video stand out:
* [**Intro & Outro Templates**](/creating-a-video/how-to-create-a-video/create-a-branded-video/templates.md)
* [**Branding (logos, profile info)**](/creating-a-video/how-to-create-a-video/create-a-branded-video/brand-kits.md)
* [**Music**](/creating-a-video/how-to-create-a-video/create-a-branded-video/music.md)
* [**Voiceovers and Avatars**](/creating-a-video/how-to-create-a-video/create-a-branded-video/voiceovers-and-avatars.md)
See the Create a Branded Video section to learn how to set up each of these.
{% endstep %}
{% endstepper %}